
Power Pages allows users to sign in using different providers like Entra ID, Google, LinkedIn, and others, which is great for authentication flexibility, but the default sign in page UI is quite basic and not easy to customize. Many developers struggle to match the login experience with their branding or modern UI expectations, so in this blog, we will see a simple and practical way to customize the sign in page by using content snippets, hiding the default components, and building a clean custom login page using Bootstrap.
Table of Contents
- Table of Contents
- Add a Content Snippet
- Hide the Existing Components
- Design a New Login Page
- Reference
Add a Content Snippet
In Power Pages, the default sign in page is not directly available as a normal web page or template, so we cannot edit it like other pages. To customize it, we need to create a Content Snippet with the correct name(Account/SignIn/PageCopy) so that Power Pages uses it for the sign in page.
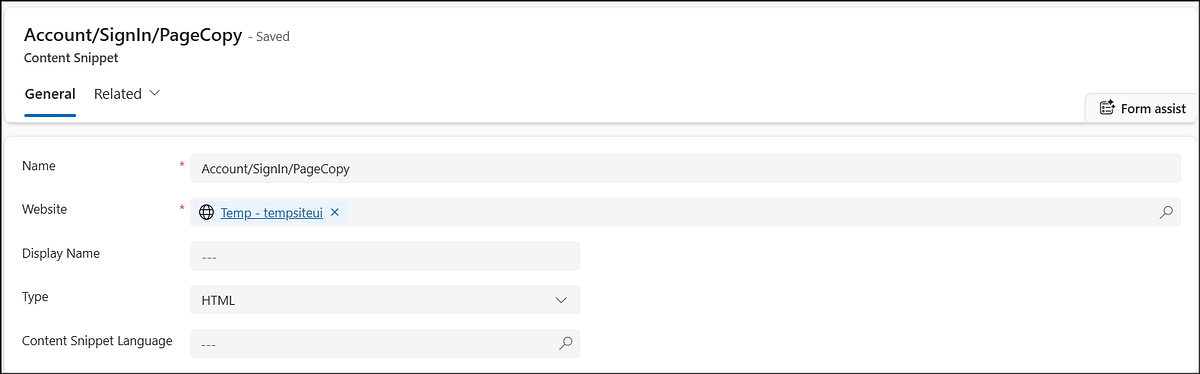
Go to the Power Pages Management App and create a new Content Snippet. Make sure the name matches the sign in page snippet and also ensure the required site settings for authentication are already configured.
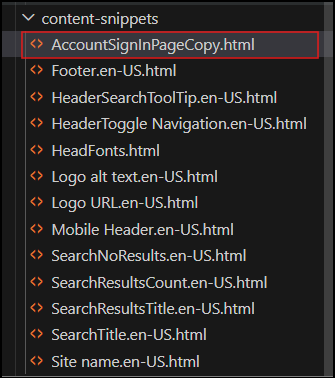
Once you save it, you can open and edit it from the HTML editor or through Visual Studio Code. This is where we will add our custom UI.
Hide the Existing Components
Even after adding the content snippet, the default login UI will still appear on the page. To fully replace it, we need to hide those existing elements.
We can do this by adding simple CSS that targets the default components and hides them. This step ensures that only our custom design is visible to the users. Below is the CSS to hide the default components.
.nav-account {
    display: none !important;
}

#mainContent .row:nth-child(2) {
    display: none !important;
}
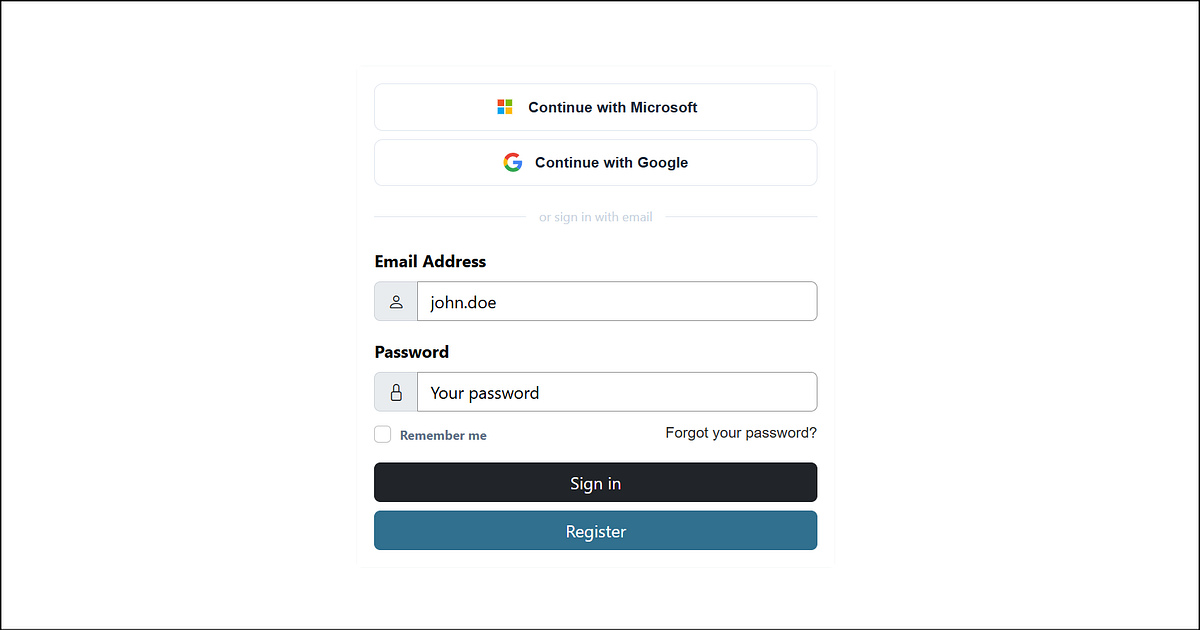
Design a New Login Page
After hiding the default UI, we can create our own login page design. Power Pages supports Bootstrap, so it becomes easy to build a responsive and clean layout.
You can design a simple login form with username, password fields, and buttons. You can also add external login options like Google or Entra ID inside your custom UI.
This way, you keep the same functionality but improve the overall look and user experience.
Reference
- Customize the sign-in and registration page in Power App Portals — Ulrikke Akerbæk
- Personalize Your Power Pages Portal with Custom Sign-Out Redirects — Microsoft Dynamics 365 CRM Tips and Tricks
- How to Set Up Google Authentication in Power Pages (Beginner Guide)?
Have a great day!


Comments